How to Check a Used Engine Before You Buy It
A professional mechanic’s step-by-step guide to inspecting fluids, testing compression, verifying provenance, and avoiding costly salvage engine mistakes.

Conducting a thorough physical and mechanical inspection on a used engine prior to purchase prevents expensive installation surprises.
Direct Takeaway & Quick Answer
Thoroughly checking a used engine before purchase requires an 8-step evaluation: inspect oil and coolant for contamination, manually rotate the crankshaft 720 degrees to verify free rotation, perform dry and wet compression tests to confirm uniform pressure (>140 PSI with <10-15% variance), verify casting and VIN numbers against your chassis, check mounting bosses for impact cracks, and demand written warranty terms with verified mileage from the seller.
- Always conduct a meticulous visual inspection for fluid emulsification, burnt oil sludge, crusted coolant leaks, and hairline casting cracks.
- Rotate the crankshaft manually 720 degrees with a breaker bar to confirm smooth rotation with no binding, valve interference, or hard stops.
- Verify cylinder compression: healthy gasoline engines exhibit uniform pressure across all cylinders with less than 10% to 15% variance.
- Cross-reference block and cylinder head casting numbers along with donor vehicle VIN to ensure generational and electronic interchangeability.
- Avoid engines with seized crankshafts, milky mayonnaise sludge, standing water in intake ports, low compression across adjacent cylinders, or unverified provenance.
Table of Contents
- 1.Visual Inspection: Fluids, Leaks, and Physical Condition
- 2.Compression Testing: Evaluating Cylinder Sealing
- 3.Checking for Blow-By, Exhaust Smoke, and Crankcase Pressure
- 4.Oil Pressure Considerations and Bearing Clearances
- 5.Checking Engine Mounts, Pulleys, and Accessory Drives
- 6.Reading Engine Data Plates, Casting Numbers, and Serial Stamps
- 7.Essential Questions to Ask the Salvage Yard or Seller
- 8.Red Flags and Deal Breakers: When to Walk Away
- #Frequently Asked Questions
Purchasing a quality used engine from an automotive recycler is one of the smartest and most cost-effective ways to restore a vehicle after catastrophic mechanical failure. A verified original equipment manufacturer (OEM) engine preserves factory metallurgy, engineering tolerances, and vehicle value at a fraction of the price of a dealership crate engine or an aftermarket remanufactured unit.
However, an internal combustion engine is an intricate assembly of high-precision moving components, dynamic seals, and thermal fluid passages. Installing an engine is a labor-intensive project—typically requiring 12 to 25 hours of professional shop labor. Discovering internal bearing knock, a cracked cylinder head, or a blown head gasket after the engine has already been bolted into your engine bay results in wasted labor, expensive return freight, and prolonged vehicle downtime.
Whether you are inspecting an engine still mounted in a donor vehicle, examining a pulled unit on an auto recycler pallet, or ordering online from a nationwide inventory network, following a rigorous mechanical inspection protocol protects your investment. This definitive guide details the exact procedures used by certified automotive technicians to evaluate used engines, verify provenance, test internal sealing, and identify critical deal breakers before handing over payment.
Visual Inspection: Fluids, Leaks, and Physical Condition
Evaluating Oil Purity, Coolant Residue, External Gaskets, and Corrosion
The first step in evaluating any used motor (whether on a pallet or still inside a donor engine bay) is an unsparing visual examination of fluid traces and critical mating surfaces. Begin by pulling the engine oil dipstick and unscrewing the oil filler cap. Examine the underside of the cap and the valvetrain components visible through the filler neck. In a well-maintained engine, you should observe light golden to dark amber oil with clean metallic surfaces. If you see a thick, tan, creamy emulsion resembling milkshake or mayonnaise, coolant has entered the lubrication system. While minor condensation can occasionally form on the underside of a cap in cold climates, heavy milky residue on the dipstick itself confirms severe internal contamination, such as a blown head gasket, warped cylinder head, or cracked block deck.
Next, assess the valvetrain for carbon sludge and baked varnish. Shining a focused inspection light into the oil filler opening allows you to inspect the camshaft lobes and cylinder head casting. Thick, crusty, black tar deposits indicate neglected oil change intervals, thermal breakdown, and potential sludge buildup throughout oil galleries and hydraulic lifters. Conversely, dark brown varnish without lumpy deposits is typical of normal mileage accumulation and represents acceptable cosmetic wear.
Examine external sealing interfaces and structural castings. Inspect the cylinder head-to-block joint, valve cover perimeter, timing chain cover, oil pan rail, and rear main seal area. While a leaking valve cover gasket or front crankshaft seal is a routine maintenance item easily replaced before installation, heavy wet oil pooling at the bellhousing joint or crusted white-green-orange coolant trails weeping down the cylinder block valleys indicate deeper thermal stress. Finally, inspect the aluminum or iron block casting itself for structural damage: check for impact cracks near motor mount ears, damaged oil pan sump basins, stripped spark plug threads, and severe road-salt corrosion that could weaken external fasteners.
| Inspection Area | Healthy Indicator | Warning Sign / Potential Defect | Diagnostic Assessment |
|---|---|---|---|
| Oil Dipstick & Filler Cap | Amber to dark brown fluid; clean metallic valvetrain visible | Creamy tan/white milky emulsion or gritty black sludge | Blown head gasket, cracked casting, or severe oil neglect; deal breaker if widespread |
| Valvetrain Gallery | Light golden varnish; smooth camshaft lobes without grooving | Thick crusty carbon deposits, gelled sludge, scored cam lobes | Thermal breakdown and lubrication starvation; high risk of premature bearing failure |
| Coolant Passages & Hoses | Clean metallic ports; residual coolant matches OEM color | Rusty brown sludge, oily sheen in water neck, heavy scale | Electrolysis, neglected cooling system, or internal combustion gas intrusion |
| Block & Sump Casting | Intact casting ribs, straight oil pan flange, intact threads | Dents on oil pan sump, cracked mounting tabs, porous corrosion | Collision impact damage or road debris strike; potential oil starvation from crushed pickup tube |
Beware of Aggressively Degreased Engines
Be cautious when evaluating a used engine that has been freshly pressure-washed and steam-cleaned prior to sale. While a clean engine looks appealing, hyper-aggressive detailing can intentionally mask chronic oil leaks, seepages at head gasket seams, and dried coolant weeping from water pump weep holes or core expansion plugs. Look closely into recessed crevices, behind the flywheel flange, and between intake runners for hidden residual leaks.

Compression Testing: Evaluating Cylinder Sealing
Understanding Dry vs. Wet Testing, PSI Baselines, and Variance Limits
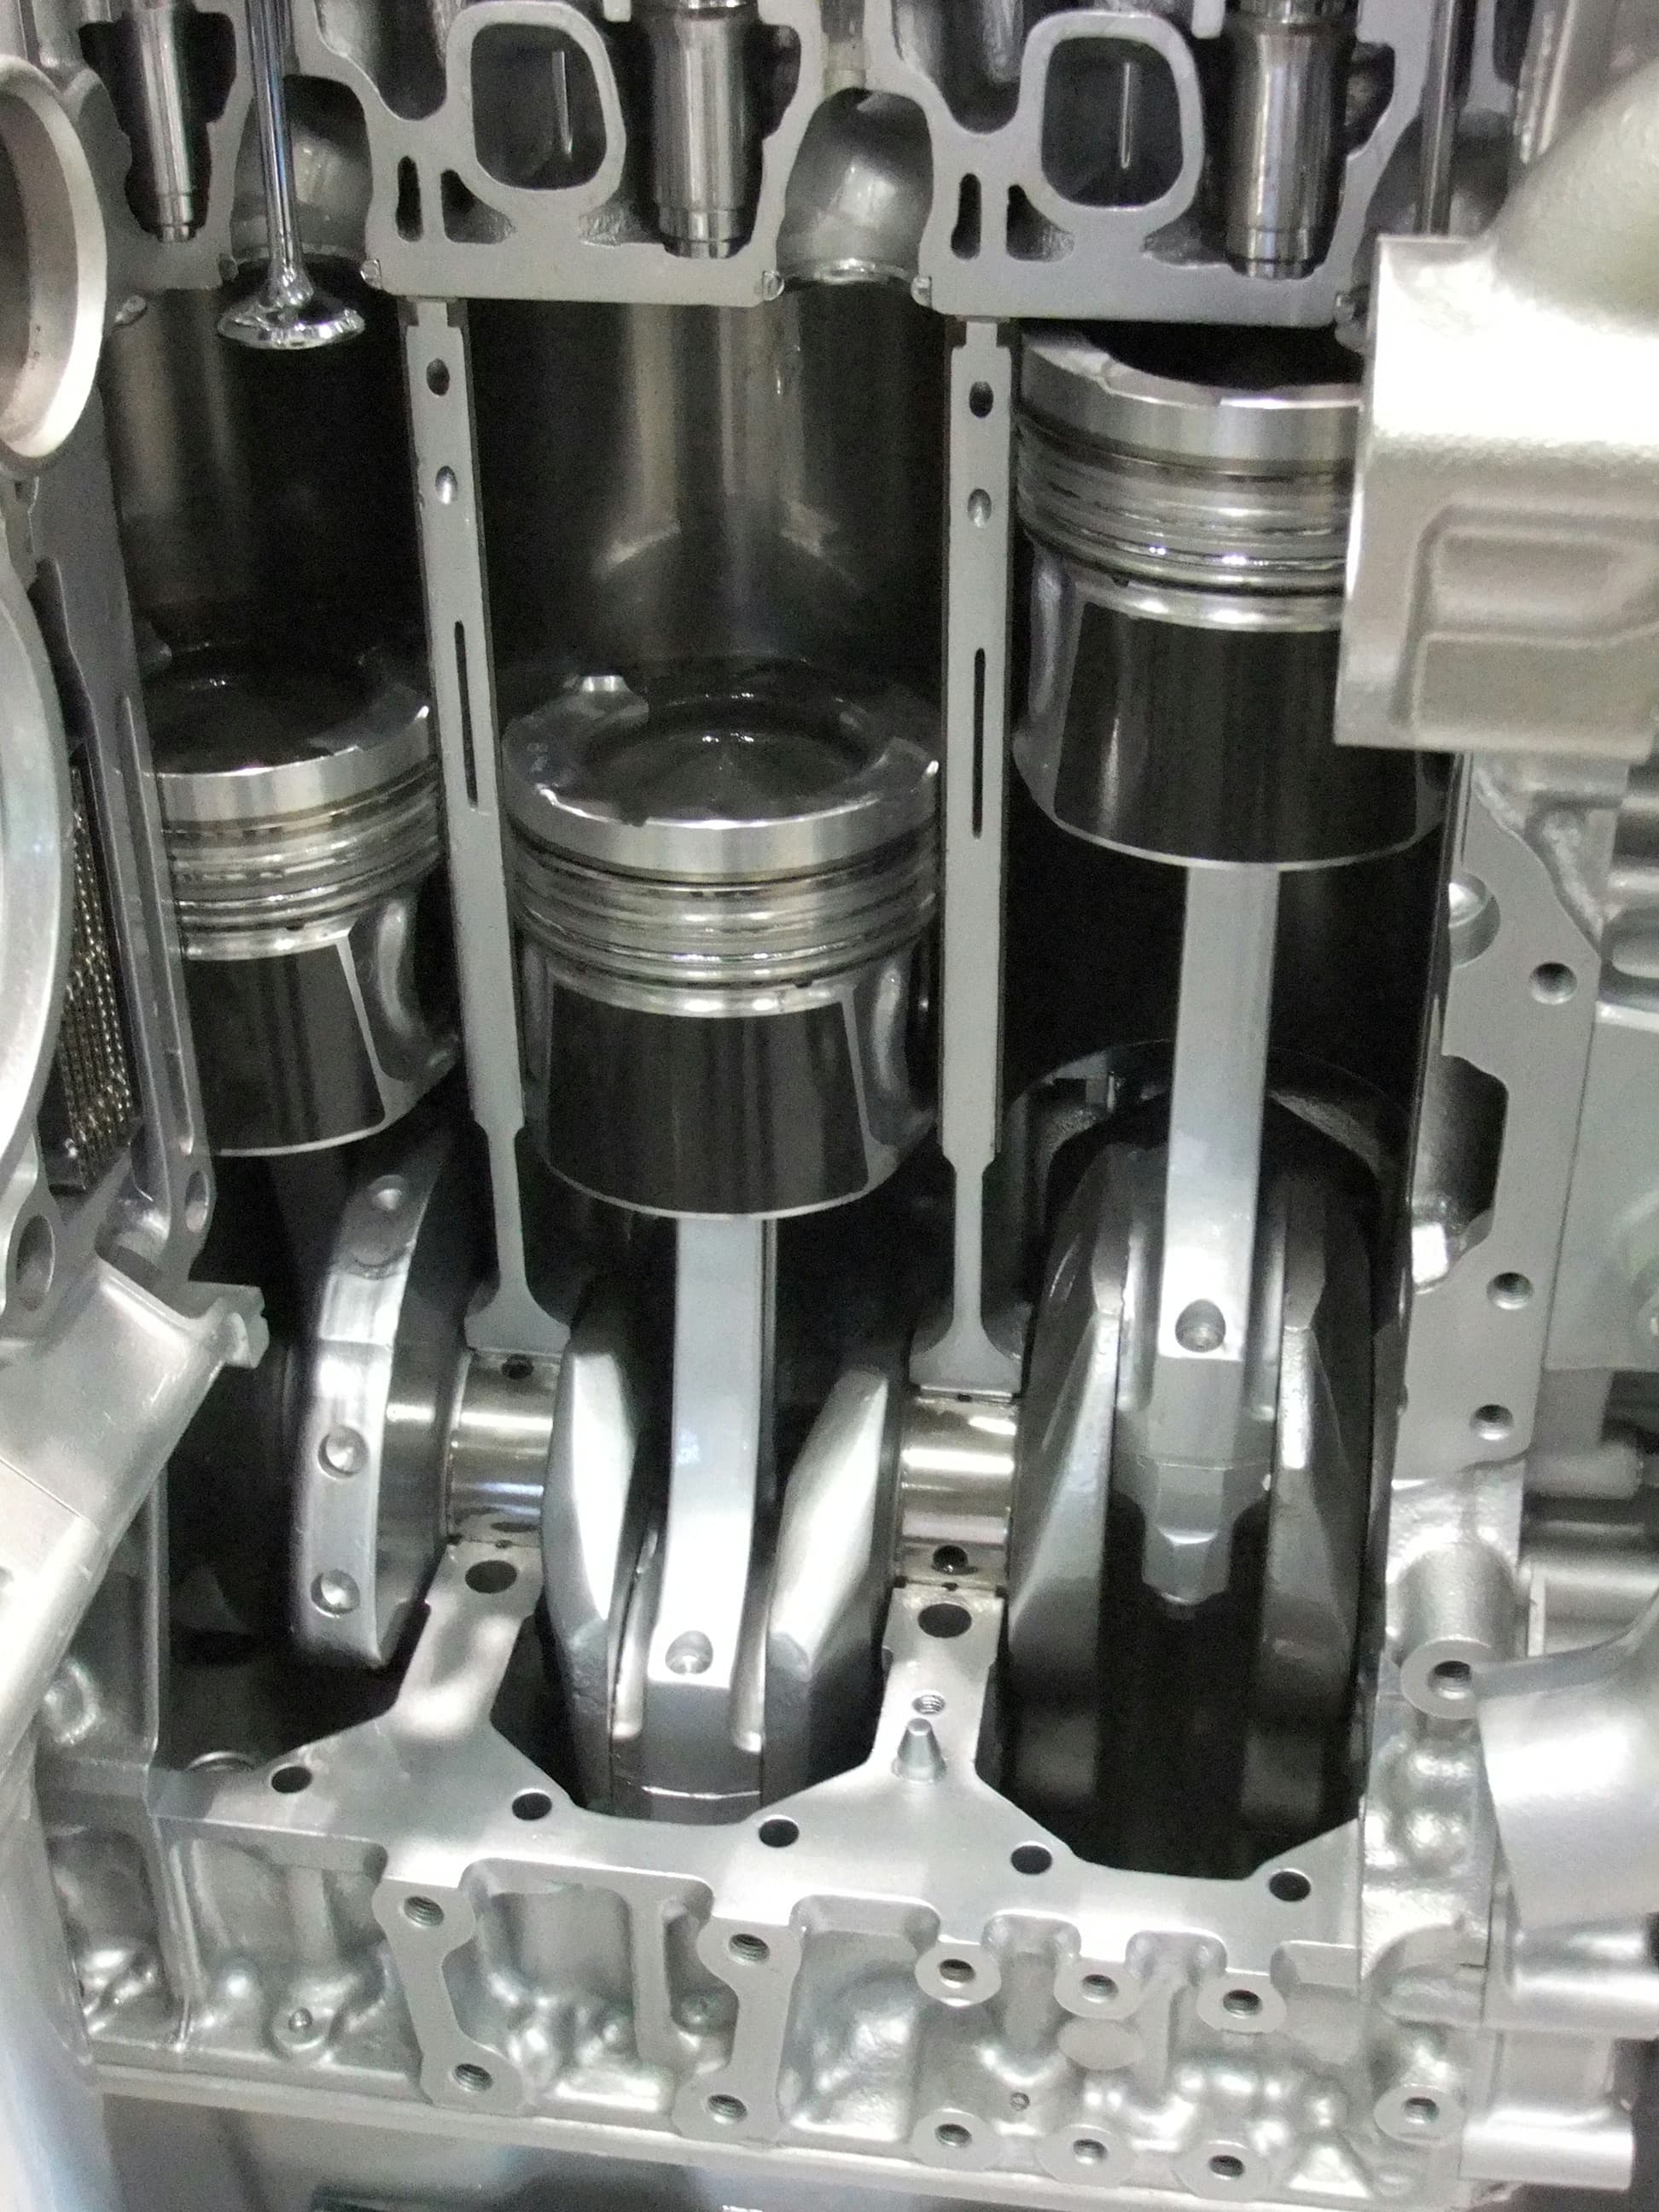
A static compression test is the single most valuable non-destructive diagnostic procedure you can perform on a used engine. It directly evaluates the mechanical sealing integrity of the combustion chamber—specifically the piston rings, cylinder wall bores, intake valves, exhaust valves, and the cylinder head gasket. To perform a standard dry compression test on an uninstalled engine, remove all spark plugs, ensure the throttle body plate is propped wide open to admit unrestricted atmospheric air, disable fuel and ignition systems, and connect a heavy-duty 12-volt battery directly to the starter motor. Thread the compression gauge hose snugly into cylinder number one and crank the engine through four to five compression pulses until the gauge needle stabilizes at its peak reading.
When evaluating compression figures, cylinder-to-cylinder uniformity is far more important than the absolute numerical pressure. Absolute PSI is influenced by ambient temperature, cranking speed, battery charge, and engine compression ratio; readings between 140 and 180 PSI are typical for modern gasoline powerplants. The critical metric is the variance percentage across all cylinders: calculate the difference between the highest and lowest cylinder readings. A healthy engine exhibits less than 10% variance (with 15% representing the absolute acceptable ceiling). For example, if your highest cylinder reads 170 PSI and your lowest reads 160 PSI, the variance is under 6%, indicating outstanding mechanical health. Conversely, if five cylinders read 165 PSI and one reads 95 PSI, that cylinder has experienced severe mechanical failure.
If you encounter a cylinder with low compression during the dry test, immediately perform a wet compression test to pinpoint the failure mode. Squirt approximately one teaspoon (5 to 10 ml) of clean 30-weight engine oil directly into the spark plug hole of the affected cylinder and allow 60 seconds for the oil to distribute around the top piston ring land. Crank the engine again and observe the gauge. If the compression reading jumps significantly (by 25 to 40+ PSI), the injected oil temporarily sealed a worn piston ring or scored cylinder wall. If the reading remains virtually unchanged and low, the mechanical fault lies in the cylinder head—such as a burnt or bent exhaust valve, carbon-jammed valve seat, broken valve spring, or a blown head gasket fire ring.
| Test Scenario | Gauge Pattern | Probable Mechanical Cause | Recommended Action |
|---|---|---|---|
| Uniform High Compression | All cylinders read 150–180 PSI within 10% variance | Intact piston rings, tight valve seats, flat deck surfaces | Prime candidate for purchase and installation |
| One Low Cylinder (Dry Test) | One cylinder reads 25%+ lower than group average | Worn rings, scored bore, or leaking intake/exhaust valve | Perform wet test immediately to isolate head vs. bottom end |
| Wet Test Recovers Pressure | Compression increases 25–40+ PSI after oil injection | Worn piston compression rings or scored cylinder sleeve | Avoid purchase unless purchasing as a rebuildable core |
| Wet Test Fails to Recover | Compression remains low (<5 PSI change after oil) | Burnt exhaust valve, cracked valve seat, bent valve stem | Requires cylinder head removal and machine shop valve job |
| Two Adjacent Dead Cylinders | Two neighboring cylinders read near zero or identical low PSI | Head gasket fire ring blown between adjoining cylinders | Major deal breaker; high probability of warped deck surface |
Performing a Cylinder Leak-Down Test for Definite Pinpointing
While a compression test provides a fast go/no-go health check, a differential cylinder leak-down test introduces regulated compressed air (typically 80 to 100 PSI) directly into a cylinder locked at Top Dead Center (TDC) on its compression stroke. By listening to where air escapes—hissing from the oil filler neck indicates ring wear, hissing from the throttle body points to intake valve leakage, air rushing out the tailpipe indicates exhaust valve failure, and bubbles in the radiator neck prove a blown head gasket or cracked casting.
Checking for Blow-By, Exhaust Smoke, and Crankcase Pressure
Diagnosing Piston Ring Sealing and Valve Stem Health on Running Units
Whenever an engine can be observed running—either in the donor vehicle prior to dismantling or on a dedicated recycler run-stand—evaluating blow-by and exhaust color provides critical insights that static tests cannot fully reveal. Every internal combustion engine generates a minimal volume of combustion blow-by, which is routinely evacuated by the Positive Crankcase Ventilation (PCV) system. However, when compression rings lose tension, carbon up, or cylinder walls become glazed and scuffed, high-pressure combustion gases force their way past the piston skirt into the crankcase, causing extreme positive pressure.
A simple and reliable field diagnostic is the "oil filler cap test." With the engine idling at normal operating temperature, unscrew the oil filler cap and let it rest loosely upside-down over the filler hole without threading it down. In a healthy engine with proper crankcase vacuum, the cap will sit gently on the hole or flutter with light engine vibration. If the engine suffers from severe blow-by, excessive crankcase pressure will violently push the cap off or blow rhythmic puffs of blue-gray vapor like a miniature locomotive stack. You should also check the dipstick tube; oil mist ejecting from the dipstick opening confirms compromised ring sealing.
Simultaneously, observe the exhaust tailpipe under three distinct operating states: initial cold startup, warm idle, and a moderate throttle rev. Different smoke characteristics point directly to specific component failures. Blue or blue-gray smoke during cold startup that clears after a minute indicates hardened, leaking valve stem seals. Blue smoke that intensifies under acceleration or continuous driving points to worn piston oil control rings or turbocharger shaft bearing seal failure. Dense white smoke with a sweet, pungent maple aroma that billows and lingers in the air indicates coolant burning in the combustion chamber. In contrast, dry black smoke simply indicates an overly rich air-fuel mixture caused by a leaking injector or faulty mass airflow sensor—an external fueling issue rather than a structural engine failure.
The Tailpipe Finger Wipe Diagnostic
If the engine cannot be started because it is already removed, run a clean gloved finger inside the donor vehicle tailpipe rim. A thin layer of dry, gray or matte black carbon soot is normal for modern gasoline engines. A thick, wet, greasy black sludge indicates chronic oil consumption, while a sticky, sweet-smelling white or green crystal residue confirms prolonged coolant consumption from an internal breach.
Oil Pressure Considerations and Bearing Clearances
Validating Lubrication System Health, Journal Tolerances, and Cam Phasers
Oil pressure is the ultimate indicator of bottom-end mechanical health. The engine oil pump forces motor oil through microscopic bearing clearances (typically 0.0015 to 0.0025 inches) supporting the crankshaft main journals and connecting rod journals. As bearings wear down or experience oil starvation, these clearances widen. Because hydrodynamic pressure relies on fluid restriction, excessive bearing clearance causes oil pressure to plummet—most noticeably when the engine oil reaches full operating temperature (190°F to 210°F) and thins out.
Never rely solely on dashboard warning lights when evaluating an engine in a running donor vehicle. Factory oil pressure sending switches are calibrated to trip only when pressure drops to catastrophic thresholds—often between 4 and 7 PSI. By the time a dashboard idiot light illuminates, metal-to-metal contact has already severely damaged crankshaft journals and camshaft journals. Always request or connect a calibrated mechanical master oil pressure gauge to an oil gallery port to verify actual pressure across the full RPM range.
When evaluating an engine that has already been pulled, inspect the oil filter and drain pan. Use an automotive oil filter cutter to open the canister and unfold the pleated paper filter element. Examine the folds under bright light: finding microscopic, non-magnetic gold, copper, or bronze flakes indicates connecting rod or thrust bearing erosion. Silver magnetic metal particles indicate camshaft lobe, lifter, or cylinder sleeve wear. Plastic or composite debris points to deteriorating timing chain tensioners and guide rails. A clean filter with zero metallic flakes provides strong physical evidence of sound internal bearing health.
Variable Valve Timing (VVT) Sensitivity to Oil Pressure
Modern overhead camshaft engines rely on pressurized motor oil to actuate Variable Valve Timing (VVT) phasers, cam adjusters, and hydraulic timing chain tensioners. If internal oil galleries are restricted by sludge or if worn main bearings bleed off hydraulic pressure, VVT sprockets fail to advance or retard properly. This results in persistent camshaft timing trouble codes (such as P0011, P0014, or P0016), rough idling, and timing chain rattle on startup.
Checking Engine Mounts, Pulleys, and Accessory Drives
Inspecting External Components, Harmonic Balancers, and Brackets
Many high-quality used engines originate from late-model vehicles that were declared total losses due to structural collision impacts rather than mechanical failure. However, the violent kinetic deceleration of a collision can exert severe torsional stress on powertrain assemblies. Before committing to a purchase, carefully inspect all structural mounting bosses cast directly into the iron or aluminum engine block and cylinder heads.
Examine every threaded engine mount boss, transmission bellhousing bolt hole, and starter mounting ear. Aluminum castings in particular can develop hairline stress cracks or shear off completely during an impact. A cracked engine mount boss cannot be safely repaired with adhesive or casual welding and can make securing the engine into your vehicle chassis impossible. Ensure that all bolt holes retain clean, undamaged factory threads without cross-threading or bolt shank fractures.
Turn your attention to the crankshaft harmonic balancer (vibration damper) and accessory drive system. The harmonic balancer features an outer metal inertia ring bonded to an inner hub via a vulcanized rubber elastomer ring. Inspect this rubber layer closely: if it is dry-rotted, cracked, swollen from oil contamination, or bulging outward, the outer ring can slip out of rotational phase, causing severe engine vibration or catastrophic crankshaft snout fatigue. Spin all accessory pulleys—water pump, alternator, power steering pump, and A/C compressor—by hand to check for axial wobble, grinding bearing noise, or binding.
- 1Inspect Structural Mounting Bosses: Thoroughly examine all cast mounting ears on the block, cylinder heads, and bellhousing flange for hairline fractures, impact chipping, or stripped bolt threads.
- 2Verify Crankshaft Snout and Pulley Trueness: Sight along the serpentine belt drive plane to confirm that the crankshaft pulley and harmonic balancer spin true with zero axial runout or bent flanges.
- 3Perform 720-Degree Manual Crank Rotation: Fit a 1/2-inch breaker bar and socket to the center harmonic balancer bolt. Rotate the engine smoothly clockwise through two complete revolutions (720 degrees). You should feel rhythmic compression resistance followed by smooth release, with zero metallic binding, clunking, or hard lockups.
- 4Check Water Pump Weep Hole: Inspect the underside of the water pump shaft snout. Any dried white, pink, or green crystalline residue indicates that the internal mechanical coolant seal has failed.
- 5Inspect Flywheel and Flexplate Teeth: Examine the starter ring gear teeth for chipping, rounding, or broken teeth. On automatic flexplates, inspect the central crankshaft bolt circle for circular fatigue stress cracks; on manual flywheels, check for heavy thermal heat checking and blue hotspots.
Long Block vs. Complete Engine Inclusions
Always clarify with the salvage yard whether an engine is sold as a "long block" or a "complete engine assembly." A long block consists of the block, cylinder heads, camshafts, oil pan, and timing cover. Complete engines include intake manifolds, fuel injectors, sensors, and occasionally wiring harnesses. External bolt-on accessories like alternators, starters, and A/C compressors are generally excluded or treated as convenience items not covered under powertrain warranties.
Reading Engine Data Plates, Casting Numbers, and Serial Stamps
Verifying Displacement, Production Date, and Cross-Platform Fitment
One of the most frequent and costly mistakes in used engine replacement is ordering an engine that appears identical externally but possesses incompatible internal engineering revisions. Automakers continuously update powertrains during a vehicle generation—modifying crankshaft reluctor wheel tooth counts (such as 24-tooth versus 58-tooth trigger wheels), changing knock sensor thread pitches, altering variable valve timing phasers, or revising cylinder head intake port contours.
To guarantee 100% mechanical and electronic interchangeability, learn to locate and decode casting numbers and serial stamps. Casting numbers are raised alphanumeric identifiers molded directly into the raw metal casting at the foundry. They are typically located on the side of the engine block skirt, behind the starter pocket, or along the cylinder head intake flange. These numbers identify the exact casting mold and displacement family. Unlike adhesive paper stickers that weather and peel away, casting numbers provide permanent metallurgical proof of the core component architecture.
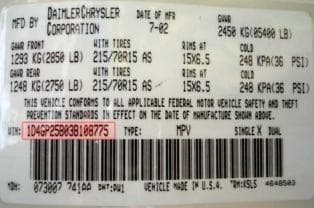
Complementing casting numbers are machined serial pads containing stamped or dot-peened production codes. These stamps reveal the engine assembly plant, calendar build date, and often the partial 17-digit Vehicle Identification Number (VIN) of the donor vehicle. By providing the donor VIN to your parts supplier, the engine can be cross-referenced through the Hollander Interchange system and automaker service databases to confirm that the displacement code (the 8th digit of North American VINs) and model year (the 10th digit) match your vehicle specifications exactly.
| Marking Type | Typical Physical Location | Information Provided | Fitment Importance |
|---|---|---|---|
| Block Casting Number | Side of block skirt, engine valley, or near starter pocket | Raw block casting mold, displacement family, deck height | Confirms core engine architecture matches vehicle chassis mounts |
| Cylinder Head Casting | Exposed outer head ledge or beneath valve cover rail | Port design, combustion chamber volume, valve sizing | Prevents compression ratio mismatches and intake manifold misalignment |
| Stamped Serial Pad | Machined flat pad at front/rear block deck or bellhousing rail | Assembly plant code, production sequence, partial donor VIN | Verifies vehicle provenance, build date, and legal non-theft status |
| Donor Vehicle VIN (8th Digit) | Donor vehicle dashboard plate, door jamb sticker, or title | Factory engine displacement, aspiration (turbo/NA), fuel delivery | Essential for cross-referencing Hollander Interchange fitment catalogs |
Watch for Electronic Reluctor Wheel Differences
Even when two engines share the exact same displacement, exterior block dimensions, and horsepower rating, subtle electronic sensor differences can prevent your vehicle computer from starting the engine. For example, crankshaft position reluctor wheels may vary between early and late production cycles. Always verify your vehicle’s exact production date and sensor configurations with your parts specialist before ordering.
Essential Questions to Ask the Salvage Yard or Seller
Gathering Provenance, Testing History, and Warranty Details
When purchasing a used engine from an auto recycler, dismantler, or private seller, the quality of your interaction with the vendor is just as revealing as your physical inspection of the motor. Professional automotive recyclers operate transparently: they maintain computerized inventory tracking, document vehicle intake details, and willingly provide comprehensive donor vehicle records to protect their commercial reputation.
Begin by asking for the complete 17-digit donor vehicle VIN. A legitimate salvage operator can immediately pull up the donor vehicle record, verify the odometer mileage recorded during intake, and confirm the vehicle history through NMVTIS (National Motor Vehicle Title Information System). Inquire directly about the circumstances of the vehicle total loss: engines harvested from rear-end or side-impact collision vehicles are prime candidates because the car was operating right up to the moment of impact. Conversely, vehicles retired due to mechanical breakdowns, engine compartment fires, or water submersion carry significantly higher operational risks.
Clarify the exact testing protocols that were conducted prior to removing and palletizing the unit. Inquire whether a live run-test was conducted, whether dry and wet compression numbers were logged per cylinder, and whether the drained engine oil was filtered through a fine strainer to check for bearing wear. Finally, demand complete written warranty documentation detailing coverage duration (e.g., 90-day to 6-month replacement coverage), covered internal components, core return procedures, and any mandatory installation prerequisites (such as installing new crankshaft oil seals and a new water pump).
- Can you provide the complete 17-digit donor vehicle VIN and intake odometer documentation?
- What was the primary cause of donor vehicle salvage (rear impact, side collision, mechanical surrender, or flood)?
- Has this engine undergone a live run-test, and what were the exact cylinder compression readings logged on your test sheet?
- Was the engine oil and coolant inspected for metal shavings, emulsification, or contamination during fluid draining?
- Does your warranty cover full replacement or refund, and what are the specific core deposit terms and return deadlines?
- What preventative maintenance items (e.g., front/rear main seals, timing belt/chain, water pump) must be replaced prior to installation to maintain warranty eligibility?
Protecting Your Purchase with Written Invoices
Never accept verbal assurances or handshake promises regarding engine mileage, testing status, or warranty coverage. Always insist on a formal commercial invoice that explicitly states the donor VIN, verified mileage, warranty duration, covered internal components, and exact return instructions before authorizing payment.
Red Flags and Deal Breakers: When to Walk Away
Recognizing Irreversible Internal Damage and Financial Pitfalls
Knowing when to walk away from a prospective used engine purchase is the most effective way to avoid financial loss and catastrophic repair headaches. Certain mechanical and physical flaws indicate damage so severe or costly to repair that the engine should be classified strictly as a rebuildable scrap core rather than a viable drop-in replacement.
The absolute number-one deal breaker is an engine that is seized or binds when rotating the crankshaft with a breaker bar. If you cannot rotate the engine smoothly through two full revolutions (720 degrees), internal mechanical failure has locked the assembly. Common causes include a spun bearing welded to a journal, a broken connecting rod jammed against the block skirt, a dropped valve wedged into a piston crown, or severe cylinder bore rust from long-term open-air storage. Similarly, low compression across two adjoining cylinders indicates a cracked cylinder head deck or blown head gasket fire ring, requiring expensive machine shop resurfacing.
Environmental storage damage represents another critical red flag. Engines left outdoors in scrap yards without protective coverings are exposed to rain and ambient humidity. Water entering through an open throttle body or spark plug hole pools in open intake runners and cylinders, pitting mirror-finished cylinder walls and rusting valve faces. Look for mud, silt, or waterlines inside electrical connectors and oil pans, which betray flood-salvaged vehicles. Finally, reject any transaction where the seller refuses to provide the donor VIN, demands untraceable peer-to-peer payments (such as Zelle, Cash App, or wire transfers), or sells the unit "as-is, where-is" with zero startup warranty.
| Evaluation Parameter | Green Light (Proceed) | Yellow Light (Investigate Further) | Red Light (Walk Away Immediately) |
|---|---|---|---|
| Crankshaft Rotation | Turns smoothly 720° with rhythmic compression pulses | Turns with slight stiffness; requires moderate breaker bar force | Completely seized, clunks, or binds solidly at specific crank angle |
| Fluid Purity | Clean amber or dark brown oil; clean coolant passages | Dry dark varnish on valvetrain; minor external valve cover weepage | Milky tan oil emulsion; metal flakes in oil; rusty mud in water jackets |
| Compression Balance | All cylinders uniform within 10% to 15% variance (>140 PSI) | One cylinder 15–20% lower; recovers fully on wet compression test | Adjacent dead cylinders (<80 PSI); zero wet test recovery; burnt valves |
| Casting & Mounts | All mounting ears, flanges, and threaded bosses intact | Minor cosmetic bracket scuffs; easily replaceable bolt-on brackets | Cracked engine mount boss on block; sheared bellhousing bolt ear |
| Storage & Environment | Stored indoors in climate-controlled warehouse; ports plugged | Outdoor storage under tarp; light surface flash rust on exhaust manifold | Submerged flood salvage; water standing in intake ports; rusty cylinders |
| Provenance & Warranty | Verified donor VIN; NMVTIS mileage; 90+ day written warranty | Odometer estimated from cluster; 30-day exchange warranty | No VIN provided; private seller evasive; sold strictly as-is with no warranty |
Deal Breaker Alert: Fire-Damaged Engines
Never purchase an engine extracted from a vehicle that suffered an under-hood fire, even if the block appears superficially intact. Intense heat alters the metallurgical temper and hardness of aluminum cylinder heads, permanently warps camshaft journal bores, melts internal valve stem seals, and weakens valve springs, leading to rapid catastrophic failure upon initial startup.
Frequently Asked Questions
How do you test a used engine that is already pulled and sitting on a pallet?
You can perform a visual fluid inspection, rotate the crankshaft 720 degrees manually with a breaker bar, conduct a dry and wet compression test using a 12V battery connected to the starter, and cut open the oil filter to inspect for metallic bearing flakes.
A reputable salvage yard will also provide documented test stand run sheets or cylinder compression readings recorded prior to extraction.
What is an acceptable compression variance between cylinders on a used engine?
Cylinder compression variance should not exceed 10% to 15% between the highest and lowest reading cylinders across the entire engine.
For example, if your highest cylinder produces 160 PSI, your lowest cylinder should not read below 136 to 144 PSI for healthy mechanical operation.
Can you check oil pressure on an engine that is not installed in a car?
Checking true dynamic oil pressure requires spinning the engine on a powered test stand or cranking it with the starter while connected to a mechanical oil pressure gauge.
On stationary palletized engines where cranking is not possible, inspecting the oil filter pleats and oil pan for bearing debris provides physical evidence of lubrication health.
What maintenance parts should always be replaced before installing a used engine?
Always replace the front crankshaft seal, rear main seal, valve cover gaskets, water pump, thermostat, spark plugs, and timing belt or timing chain tensioners prior to installation.
Replacing these wear components while the engine is out of the vehicle saves hundreds of dollars in future labor and is often required to maintain warranty validity.
What does milky oil under the valve cover cap indicate?
A milky, tan, or mayonnaise-like emulsion indicates that engine coolant and motor oil have mixed, typically caused by a blown head gasket, warped cylinder head, or cracked block casting.
While minor condensation can form on the cap in cold climates during short drives, heavy milky sludge on the dipstick confirms catastrophic internal fluid contamination.
How does a cylinder leak-down test differ from a standard compression test?
A compression test measures dynamic pressure built during cranking, while a leak-down test injects compressed air into a stationary cylinder at top dead center to measure the percentage and location of air leakage.
Listening to where escaping air exits (oil cap, throttle body, tailpipe, or radiator) pinpoints whether piston rings, intake valves, exhaust valves, or head gaskets are leaking.
Find a Tested, High-Quality Used Engine Today
Don’t gamble on unverified salvage engines. Explore our nationwide inventory of inspected, compression-tested used OEM engines backed by warranty coverage and fast freight delivery.
Relevant Parts Inventory
Tested Used OEM Engines
PopularSearch our nationwide inventory of compression-tested used engines with verified mileage and warranty coverage.
Quality Used Transmissions
Browse verified OEM automatic and manual transmissions inspected for smooth shifting and structural integrity.
Search All Recycled Auto Parts
Access our comprehensive nationwide catalog of genuine recycled OEM auto parts and components.
Related Automotive Guides
Used Engine Buying Guide: Mileage, Compression, Warranty and Fitment
VIN Number Guide: How to Identify the Right Auto Part for Your Vehicle
OEM vs Aftermarket vs Used Parts: What's the Difference?