How to Tell If a Used Transmission Is in Good Condition
A professional bench inspection roadmap covering fluid forensics, torque converter checks, electronic solenoids, casting integrity, and donor vehicle verification.
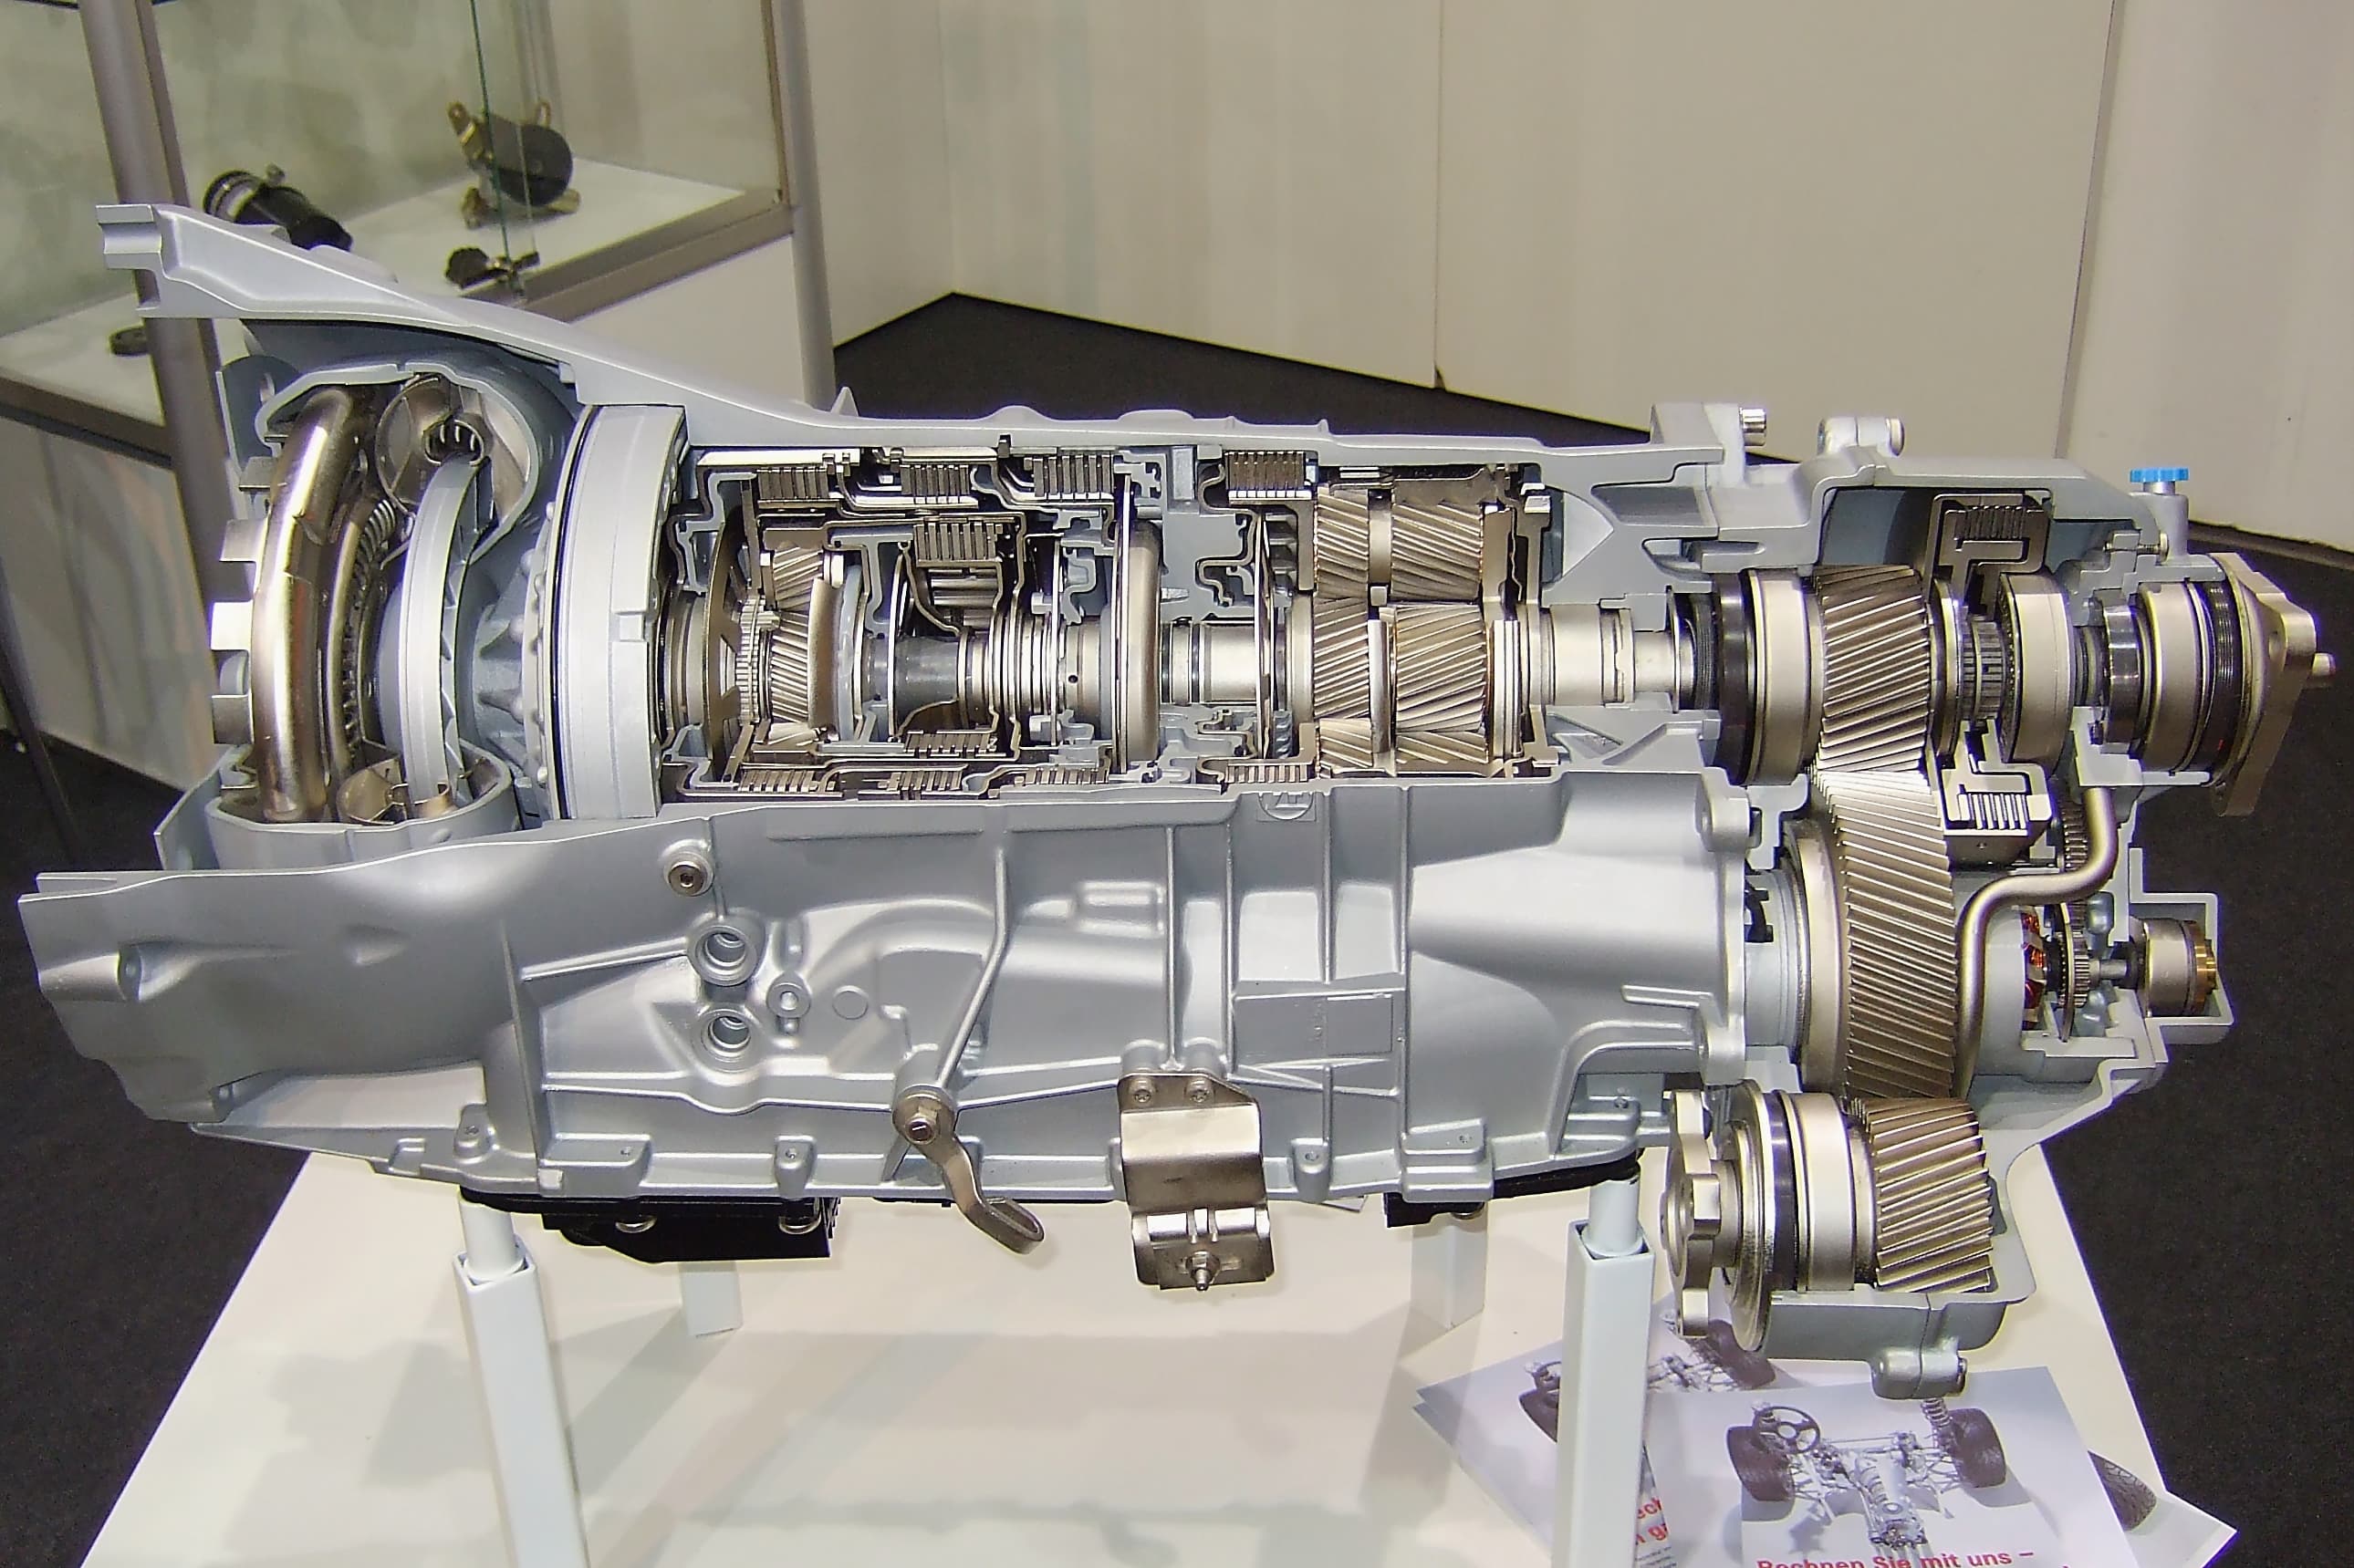
A comprehensive multi-point bench inspection ensures a replacement used transmission is structurally sound and ready for reliable service.
Direct Takeaway & Quick Answer
Determining whether a used transmission is in good condition requires a systematic multi-point bench evaluation before installation: verifying the aluminum case and bellhousing casting for stress fractures; conducting fluid forensics for burnt clutch material or glycol contamination; checking torque converter hub splines and one-way stator clutch operation; decoding the factory identification tag for exact calibration; and inspecting the donor vehicle history.
- Visual case inspection reveals hidden collision fractures, stripped bellhousing mounting ears, and leaking shaft seal journals before purchase.
- Transmission fluid condition is the ultimate diagnostic indicator: reject any unit with black, acrid-smelling fluid or milky pink coolant contamination.
- Torque converter hub notches, pilot snout concentricity, and input shaft splines must be checked for galling and heat bluing.
- Always match transmission model tags, broadcast codes, and 2WD/4WD drivetrain configurations to prevent costly electronic or mechanical incompatibilities.
- Flushing the vehicle transmission cooler and cooler lines is mandatory before installation to prevent residual metal particulate from destroying the replacement unit.
Table of Contents
- 1.Exterior Housing and Structural Integrity Inspection
- 2.Transmission Fluid Forensics: Color, Odor, and Contamination
- 3.Identifying Transmission Model Tags, Broadcast Codes, and Calibration
- 4.Torque Converter and Input Shaft Evaluation
- 5.Checking Solenoids, Valve Body, and Internal Mechatronics
- 6.Signs of Overheating, Clutch Slipping, and Mechanical Failure
- 7.Manual vs. Automatic Transmission Inspection Differences
- 8.The Pre-Purchase Buyer's Checklist: Critical Questions to Ask
- #Frequently Asked Questions
Replacing an automatic or manual transmission is one of the most labor-intensive and financially significant mechanical repairs a vehicle owner will ever undertake. With new dealership crate transmissions frequently commanding between $4,000 and $8,000 before labor, sourcing a high-quality recycled OEM transmission from a reputable dismantler offers tremendous cost savings—often reducing repair expenses by 60% to 75%.
However, purchasing a pre-owned transmission without performing due diligence can turn an economical repair into an expensive headache. Because a transmission operates as an enclosed, sealed hydraulic and mechanical unit, assessing its internal health on a warehouse pallet or inspection stand requires specialized diagnostic techniques.
Professional automotive technicians and salvage inspectors rely on physical forensics—ranging from casing metallurgy analysis and fluid degradation checks to torque converter spine inspection and solenoid resistance tests. This guide details the complete inspection protocol to verify that a used replacement transmission is healthy, functional, and ready for many miles of dependable driving.
Exterior Housing and Structural Integrity Inspection
Examining Bellhousing Castings, Mounting Ears, and Seal Interfaces
A thorough pre-purchase evaluation starts with an unhurried, 360-degree visual examination of the aluminum or iron casing. Donor vehicles frequently end up in salvage yards due to front-end or side-impact traffic collisions. During a severe collision, the sudden deceleration force transfers massive kinetic energy through the engine mounts directly into the transmission bellhousing and crossmember mounts.
Inspect every bellhousing mounting ear, alignment dowel hole, and structural rib. Look closely for hairline stress fractures running outward from the bolt bosses. Hairline cracks often appear as faint dark lines or jagged zig-zag fissures across the natural texture of the cast aluminum. Pay special attention to the bottom perimeter of the bellhousing and the starter pocket, where severe impact loads typically concentrate.
Examine the rear extension housing (tailshaft) and transfer case adapter flange on 4WD and AWD units. Check the output shaft seal journal and front oil pump snout for signs of physical gouging, rust pitting, or heavy oil seepage. A transmission that landed hard on its oil pan during vehicle transport or extraction may suffer from an inward-dented pan that pinches the internal oil filter pickup tube against the pan floor, which starves the pump of fluid upon startup.
- Bellhousing perimeter and dowel pockets: Verify all bolt holes are intact with zero thread stripping or broken ear lugs.
- Transmission crossmember mount bosses: Check the bottom threaded mounting pads for cracks, sheared bolts, or wallowed threads.
- Tailshaft extension and transfer case flange: Ensure the rear casting is free of cracks, bending, or bushing distortion.
- Oil pan bottom surface: Check for dents or punctures that could crush the internal suction strainer or valve body solenoids.
- Cooler line port fittings: Inspect threaded transmission cooler ports for cross-threading, stripped threads, or cracked casing bungs.
The Danger of Welded or Repaired Aluminum Housings
Never accept a transmission casing that has been repaired with epoxy putty, metal fillers, or amateur TIG welding on structural mounting ears. Under engine torque deflection and road vibration, patched aluminum casings will fracture, risking catastrophic failure that can crack the engine block flange or drop the driveshaft.
Transmission Fluid Forensics: Color, Odor, and Contamination
What Dipstick Fluid and Drain Pan Residue Reveal About Internal Clutches
Automatic transmission fluid functions simultaneously as a hydraulic operating fluid, a friction-modifier for internal clutch packs, and a cooling medium for planetary gearsets. Because automatic transmissions operate through hydraulic pressure applied against friction clutches and steel reaction plates, fluid degradation directly reflects internal component wear.
To inspect fluid on an uninstalled transmission, pull the dipstick (if equipped) or remove the lower drain plug to sample a small volume of residual fluid. Wipe the fluid across a clean white paper towel or lint-free shop rag. Observe the color, transparency, and smell. Fresh, healthy ATF presents a bright cherry red or transparent amber color with a mild petroleum odor. Dark brownish fluid indicates standard thermal aging, which may be acceptable if there is no accompanying burnt smell.
If the fluid is opaque black and emits a pungent, acrid stench reminiscent of burnt electrical insulation or scorched brakes, the internal clutch friction material has burned down to the bare steel backing plates. Furthermore, check for "strawberry milkshake" fluid: a milky, opaque pink foam produced when the internal transmission cooler inside the vehicle radiator cracks, pumping water and ethylene glycol into the transmission. Water immediately dissolves the water-based adhesives bonding friction paper to the clutch plates, causing rapid delamination and total transmission failure.
| Fluid Appearance | Fluid Odor | Internal Mechanical Condition | Risk Level | Recommendation |
|---|---|---|---|---|
| Translucent Bright Red / Pink | Mild petroleum / sweet | Clutch packs, seals, and bands in healthy operating condition | Low | Approved; install with fresh filter and factory-spec fluid |
| Dark Brown / Opaque Red | Mildly heated, earthy | Standard fluid aging; normal microscopic clutch dust accumulation | Moderate | Acceptable; verify pan magnet before final installation |
| Jet Black / Charcoal Gray | Acrid, pungent, scorched | Severe clutch plate slippage; friction lining burned down to steel | Fatal | Reject transmission; internal overhaul or core rebuild required |
| Milky Opaque Pink ("Milkshake") | Sweet / chemical odor | Coolant contamination from ruptured internal radiator cooler tank | Fatal | Reject transmission; water dissolves internal clutch lining adhesives |
| Glittering Silver / Bronze Silt | Burnt oil / metallic | Catastrophic wear of planetary carriers, thrust washers, or bushings | Fatal | Reject transmission; metallic shrapnel contaminated entire valve body |
The Pan Magnet Inspection Technique
Whenever possible, drop the lower oil pan to inspect the internal collection magnet. A fine, velvety layer of gray metallic dust (like graphite paste) is normal wear from steel clutch friction plates. However, if you find shiny brass flakes, silver needle-like shards, or chunks of snap rings, the internal mechanical hard parts have disintegrated.
Identifying Transmission Model Tags, Broadcast Codes, and Calibration
Decoding Metal Identification Plates and Stamped Case Markings for Exact Fitment
A common and costly mistake among DIY mechanics and repair shops is assuming that any transmission from the same vehicle model line or engine family will interchange seamlessly. In modern computer-controlled drivetrains, automakers manufacture dozens of calibration variants for a single transmission family across different vehicle trims, rear axle ratios, and model years.
For example, a GM 6L80 or Ford 6R80 transmission manufactured for a full-size pickup truck will feature different torque converter stall speeds, clutch pack plate counts, and internal shift solenoid calibrations than the same transmission model installed in a passenger SUV or rear-wheel-drive sedan. Furthermore, internal Transmission Control Modules (TCMs) and mechatronic leadframes communicate via vehicle-specific CAN-bus networks; installing an incorrect calibration can result in communication fault codes and perpetual limp-mode operation.
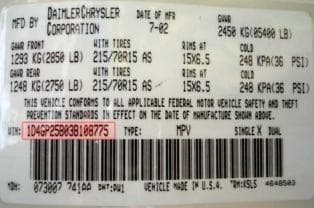
Locate the permanent metal identification plate, laser-etched matrix code, or stamped alphanumeric serial tag on the transmission casing. On most modern gearboxes, this tag is affixed to the passenger side of the main housing, near the pan rail, or atop the bellhousing flange. Reputable automotive recyclers catalog these identifiers using the Hollander Interchange system and cross-reference them directly against the donor vehicle VIN.
- 1Locate the physical ID tag or laser etching: Thoroughly clean the casing ribs, oil pan rail, and rear tailhousing with solvent to expose the factory tag or stamped identification numbers.
- 2Record the transmission model and broadcast code: Note the 4-to-6 alphanumeric broadcast code (e.g., build code letters that designate the specific internal gearset, valve body calibration, and torque rating).
- 3Cross-reference donor VIN with your vehicle: Confirm the donor vehicle 17-digit VIN shares an identical 8th digit engine code and compatible model year production range to avoid mid-cycle harness changes.
- 4Verify drivetrain configuration (2WD vs. 4WD/AWD): Ensure the donor unit matches your drivetrain architecture; 2WD transmissions feature long, splined output shafts, whereas 4WD units feature short stub shafts designed to mate directly to a transfer case.
2WD vs. 4WD Output Shaft Differences
A 2WD automatic transmission cannot easily be converted for 4WD or AWD use. The output shaft on most automatic transmissions is the very last component installed into the case; replacing it with a 4WD short shaft requires a complete, bare-case teardown of every clutch drum and planetary carrier.

Torque Converter and Input Shaft Evaluation
Inspecting Pump Drive Hubs, Pilot Bushings, Stator Splines, and Heat Bluing
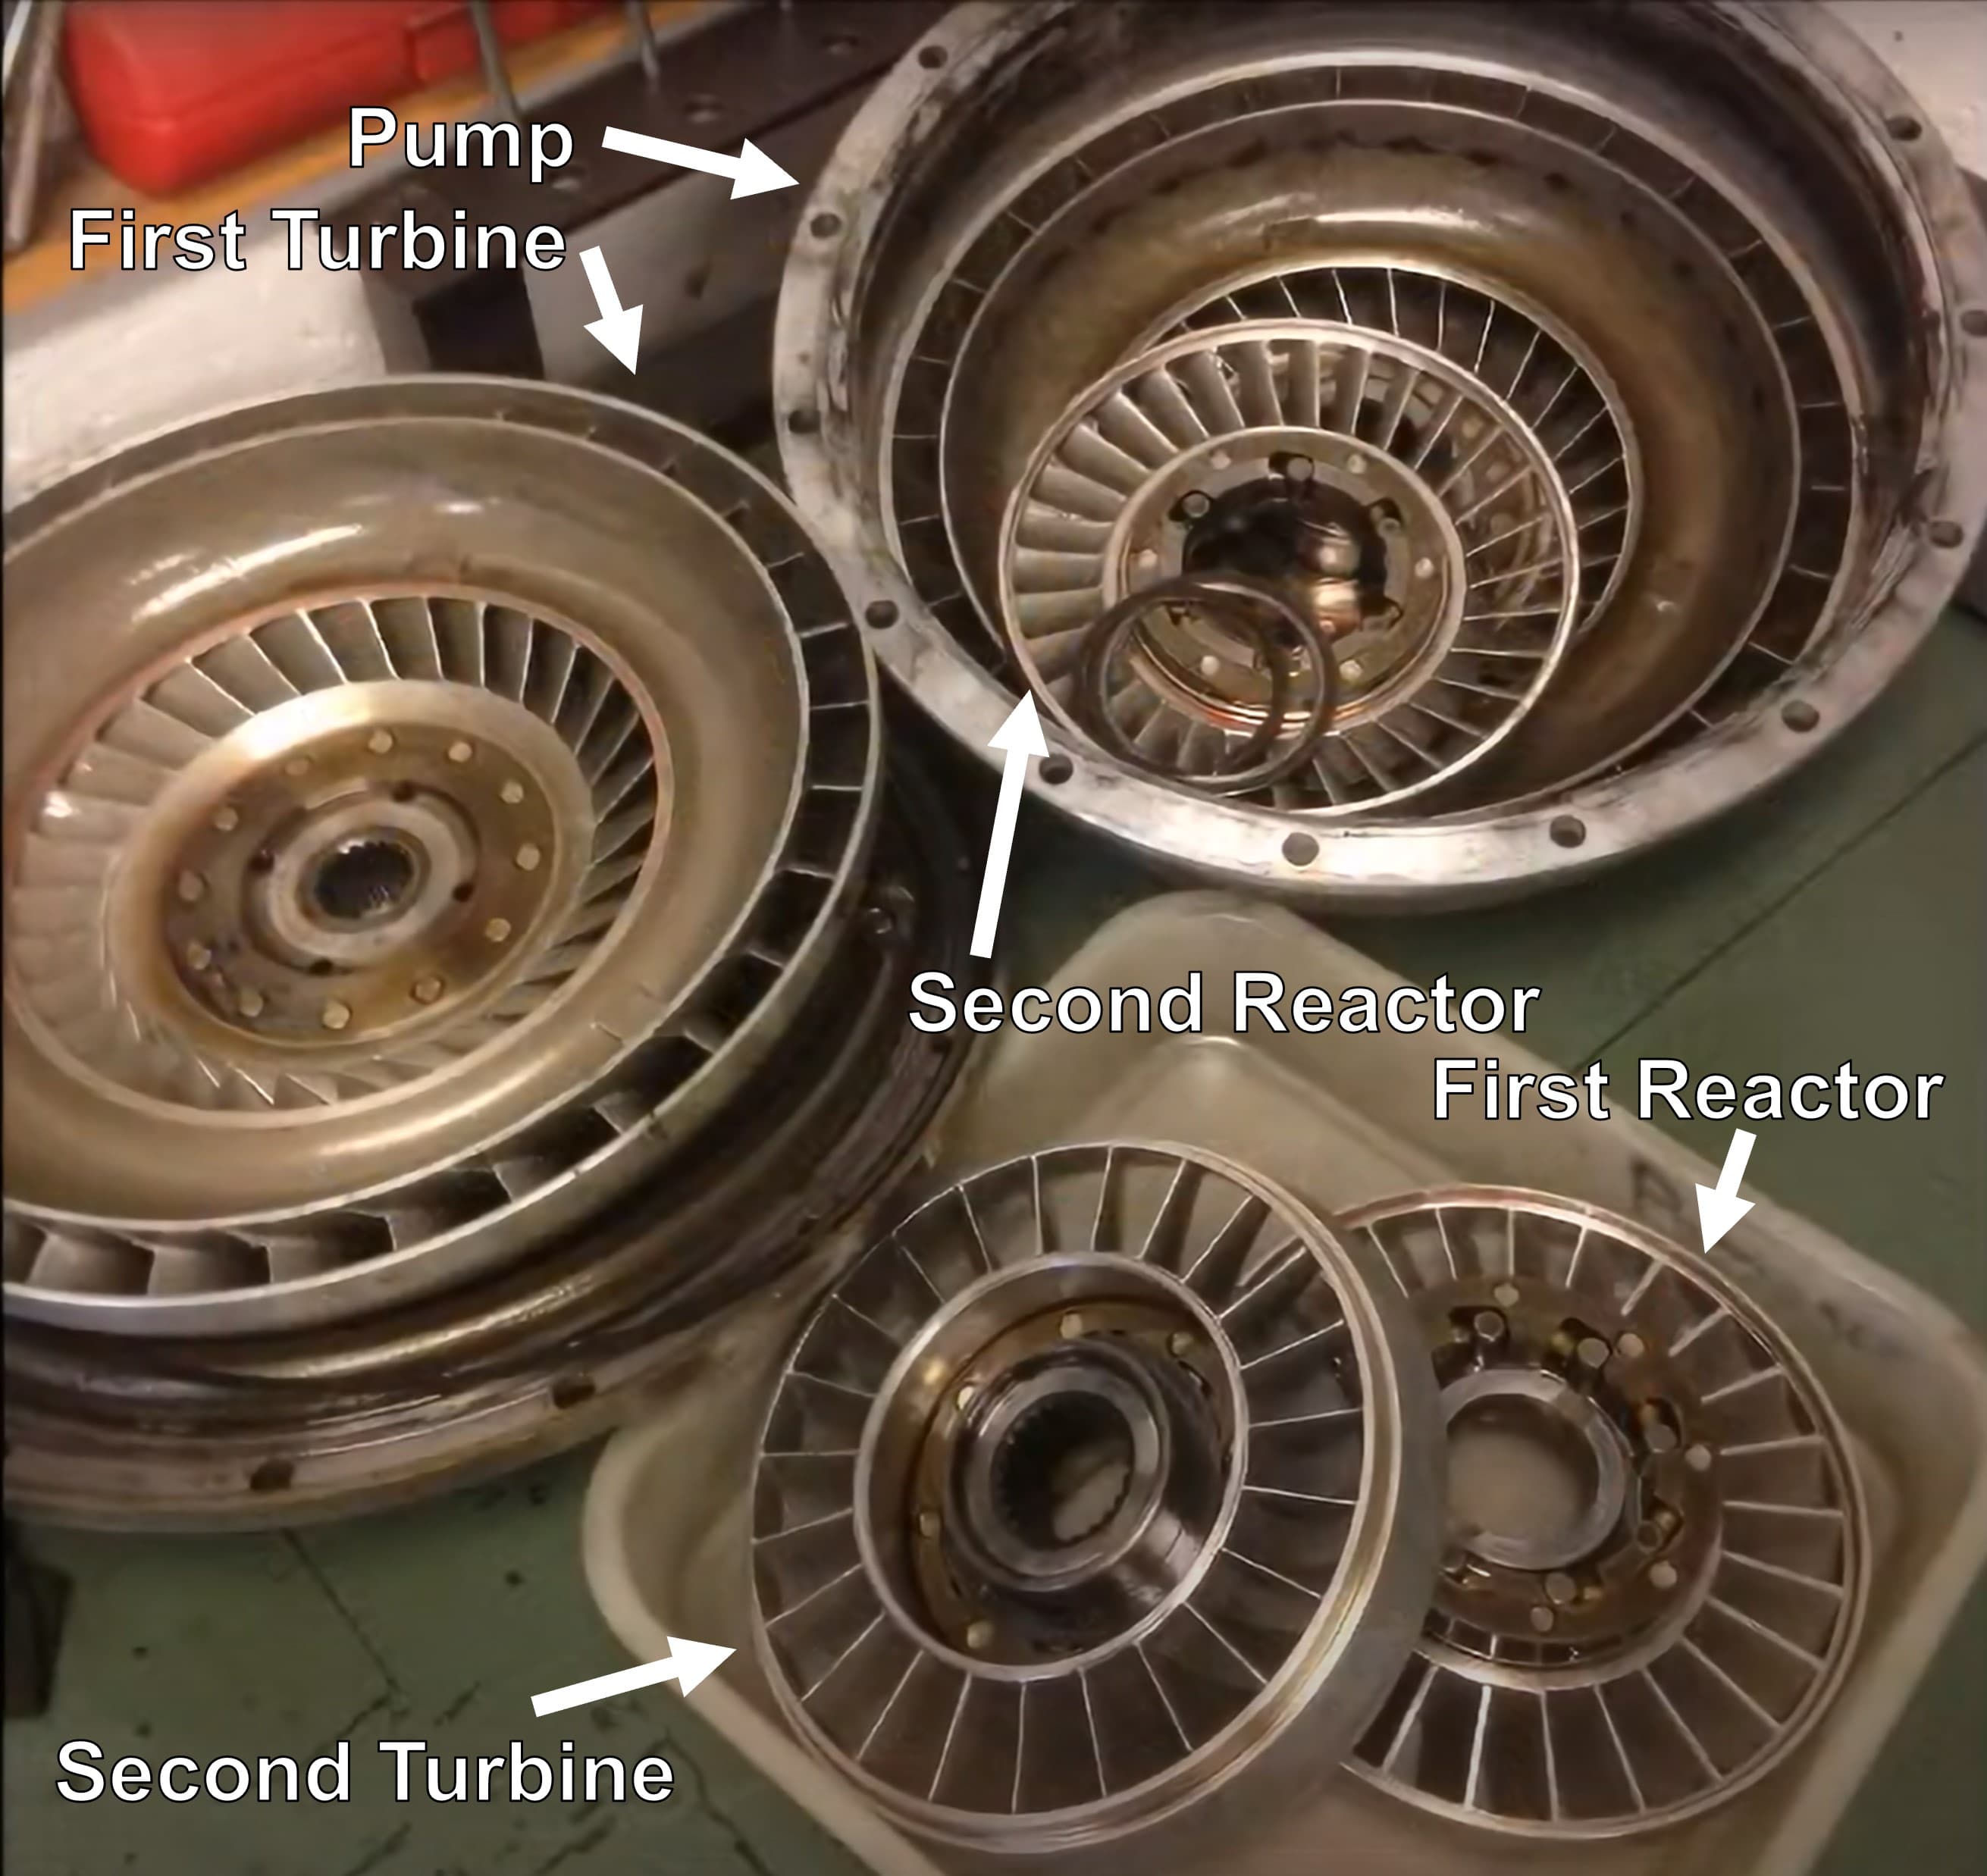
In an automatic drivetrain, the torque converter acts as the fluid coupling connecting the engine crankshaft to the transmission input shaft. It contains an impeller pump, turbine, stator with a one-way sprag clutch, and an internal lockup clutch assembly. Because torque converters absorb substantial kinetic and thermal energy, installing a damaged or contaminated converter will immediately ruin an otherwise healthy transmission.
Begin by inspecting the central drive neck (hub) of the torque converter that slides into the transmission front oil pump. The cylindrical hub surface must be mirror-smooth. If you detect deep circumferential grooves worn by the front oil pump seal or metal galling from a dry pump bushing, the converter will leak fluid or bind during operation. Inspect the drive notches or drive flats on the end of the hub; these tangs engage the inner rotor of the front oil pump and must be crisp, square, and free of rounded corners.
Reach inside the splined central bore of the converter with your fingers or a small splined tool to check the stator one-way clutch. The stator must rotate smoothly and freely in one direction while locking solidly in the opposite direction. If the stator spins freely in both directions or locks in both directions, the converter is defective and will cause sluggish off-the-line acceleration or severe highway overheating. Finally, inspect the transmission input shaft splines for twisted teeth, thinning, or fretting rust.
- Pump drive notches: Verify drive slots or tangs on the hub are sharp and unworn to guarantee positive engagement with the pump rotor.
- Hub sealing neck: Inspect the machined neck for scoring, deep wear grooves, or burrs that could tear the front pump oil seal.
- Pilot snout alignment: Ensure the forward pilot nub that seats into the rear of the engine crankshaft is straight, round, and rust-free.
- Thermal bluing check: Inspect the welded seam and outer converter shell; blue or purple heat discoloration indicates severe lockup clutch slippage.
- Input shaft splines: Ensure splines on the transmission input shaft and stator support tube are straight with zero twisted or chipped teeth.
The Critical "Three-Click" Seating Rule
When reinstalling a torque converter into a transmission, it must be gently rotated and pushed inward until it drops through three distinct splined steps: the input shaft splines, the stator support splines, and the front pump gear tangs. Attempting to bolt the transmission to the engine before the converter is fully seated will crack the front pump housing and instantly destroy the transmission.
Checking Solenoids, Valve Body, and Internal Mechatronics
Evaluating Lead Frames, Harness Connectors, and Electrical Pin Integrity
Over the past two decades, transmission engineering has transitioned from purely mechanical and vacuum-controlled hydraulic circuits to sophisticated computer-controlled mechatronic assemblies. Modern 6-speed, 8-speed, and 10-speed transmissions utilize computer-pulsed solenoids to manage line pressure, shift timing, and torque converter lockup within milliseconds.
Inspect the main exterior wiring harness connector on the transmission casing. Remove the protective cap and shine a light into the pin cavities. The plastic housing must be intact, and the male connector pins must be clean, straight, and completely free of corrosion. A widespread failure point across several modern transmission designs is internal seal degradation that allows pressurized transmission fluid to seep past the electrical bulkhead connector, wicking fluid directly through the wiring pins and creating intermittent short circuits.
On transmissions with exposed valve bodies or accessible solenoid harnesses, perform a bench resistance test using a digital multimeter (DMM). Set the meter to ohms and test each solenoid circuit against ground or between corresponding terminal pins. Standard on/off shift solenoids typically display resistance readings between 10 and 25 ohms, while pulse-width modulated (PWM) variable force solenoids measure lower resistance, generally between 3 and 7 ohms. An open circuit (infinite resistance) or a dead short indicates a burned solenoid coil that requires replacement.
- Bulkhead connector inspection: Check for transmission fluid weeping through the electrical pin socket, which causes electronic communication faults.
- Connector locking collar: Ensure plastic twist-lock collars or sliding latch tabs are intact to guarantee moisture-tight sealing.
- Solenoid coil resistance check: Measure resistance across solenoid terminals with a digital multimeter to confirm values match OEM factory tolerances.
- Lead frame and conductor plate check: On transmissions utilizing plastic molded leadframes, verify the plastic is free of heat cracking or warped conductor bus bars.
- Internal harness wiring: Inspect visible internal ribbon cables and insulated wiring for pinching, chafing against the valve body, or brittle insulation.
Addressing Fluid Intrusion in Mechatronic Connectors
Certain widely produced transmissions (such as Mercedes-Benz 722.6 units and Ford 6R80 transmissions) utilize a molded bulkhead connector sleeve with silicone O-rings. If transmission fluid is present inside the pin connector, replace the connector sleeve and seals prior to installation to prevent erroneous transmission diagnostic trouble codes (DTCs).
Signs of Overheating, Clutch Slipping, and Mechanical Failure
Forensic Markers That Reveal a Damaged, Abused, or High-Stress Transmission
Heat is the single greatest enemy of any automatic transmission. Standard automatic transmission fluid operates optimally between 160°F and 195°F (71°C to 90°C). When a transmission is subjected to chronic towing overloading, stuck in deep snow, or operated with inadequate cooling, fluid temperatures can easily spike past 240°F (115°C). At these elevated temperatures, fluid oxidation accelerates exponentially, and internal rubber lip seals become brittle.
Inspect the transmission casing paint and external metal finish. A transmission that experienced extreme overheating will exhibit blistered, discolored, or flaking paint on the casing near the center clutch drums. Look at the rubber output shaft seal and front pump seal; healthy seals are pliable and elastic, whereas overheated seals turn rock-hard, glossy, and brittle, cracking when pressed with a fingernail.
Another critical forensic check is the manual shift linkage and shaft rotation. With the transmission securely rested on a bench, use a wrench or pliers to manually cycle the transmission shift lever through each gear position: Park, Reverse, Neutral, Drive, and lower gears. The internal rooster comb spring detent should produce a crisp, positive mechanical click into each gate. If the selector binds, feels mushy, or will not engage Park, internal linkage components or parking pawl springs are bent or broken.
- Casing paint discoloration: Blistering paint or chalky aluminum oxidation around the center drum area signals extreme thermal stress.
- Seal elasticity: Inspect front and rear rubber lip seals; brittle, hardened rubber confirms prolonged operation under severe thermal runaway.
- Manual shaft detent feel: Cycle the manual shift lever through all detent positions to verify sharp, positive engagement of the internal rooster comb.
- Shaft rotation smoothness: Rotate the input shaft by hand with the transmission in Neutral; rotation should be smooth without tight spots, binding, or grinding.
- Baked varnish coating: Look into cooling ports or dipstick tubes; amber or brown varnish film indicates old fluid that broke down under thermal overload.
Beware the "Freshly Cleaned Pan" Trap
Be cautious of private salvage listings where the transmission oil pan is immaculately scrubbed with fresh, spotless fluid, but the remainder of the exterior casing is caked in years of road grime. Sellers sometimes wipe clean a pan full of shredded clutch material and refill it with new fluid to conceal terminal internal failure. Check unwashed crevices around the cooler ports for traces of the original fluid.
Manual vs. Automatic Transmission Inspection Differences
Synchronizer Wear, Shaft Endplay, and Bearing Diagnostics for Standard Gearboxes
Manual transmissions operate on fundamentally different mechanical principles than automatics. Instead of hydraulic planetary gearsets, torque converters, and friction clutch packs, manual gearboxes utilize solid parallel input, counter, and output shafts fitted with constant-mesh helical gears, sliding synchronizer sleeves, and brass or carbon blocker rings.
When inspecting a used manual transmission, the most critical physical check is input shaft bearing play. Grasp the splined input shaft firmly with your hand and attempt to move it up, down, and side-to-side (radial play), as well as pushing and pulling along the shaft axis (axial endplay). While a minute amount of clearance (0.002 to 0.005 inches) is normal, noticeable clunking, rocking, or radial wobble indicates worn input shaft bearings or a failing pocket bearing.
Next, evaluate the synchronizers and shift rail mechanism. Attach a temporary shift lever or use vice-grips on the shift linkage to cycle through every forward gear (1st through 5th/6th) and Reverse while slowly rotating the input shaft by hand. The gears should engage cleanly with a firm mechanical lock. If a gear refuses to engage or grinds harshly, the brass synchronizer teeth are rounded off or the internal shift fork is bent. Finally, remove the magnetic drain plug to inspect for metal chips from broken gear teeth.
| Inspection Category | Automatic Transmission Protocol | Manual Transmission Protocol |
|---|---|---|
| Fluid Forensics | Check ATF color, odor, and clutch particle suspension; verify no coolant contamination | Check gear lube viscosity; inspect for yellow brass glitter from synchronizer rings |
| Power Input Interface | Inspect torque converter hub, pump drive notches, and pilot snout concentricity | Inspect input shaft clutch splines, throwout bearing guide tube, and pilot bearing tip |
| Internal Shifting Mechanism | Test shift solenoids with multimeter; inspect valve body and electronic harness | Cycle shift linkage through all forward gears and Reverse; check shift rail detents |
| Critical Bearing Check | Rotate input shaft in Neutral; check for front pump binding and planetary resistance | Grasp input shaft; check for radial play, axial endplay, and smooth, quiet hand rotation |
| Primary Failure Indicator | Burnt black fluid, slipping clutch packs, cracked front oil pump housing | Chipped or rounded gear teeth, worn synchronizer blocker rings, rumbling shaft bearings |
Testing Manual Input Shaft Bearings by Hand
Spin the input shaft briskly by hand in Neutral while holding your ear against the transmission case in a quiet room. The shaft should spin with a smooth, quiet hiss. If you hear a rumbling, grumbly growl or feel a rough, gravelly sensation in your fingers, the input shaft bearing races are pitted and brinelled.
The Pre-Purchase Buyer's Checklist: Critical Questions to Ask
Essential Questions to Verify Donor Vehicle History, Testing, and Warranty Coverage
Purchasing a recycled transmission from an established, reputable auto recycler significantly reduces the risks associated with drivetrain replacement. Professional dismantlers document donor vehicle mileage, evaluate fluid condition during dismantling, verify interchange numbers, and provide written warranty protections that protect your investment.
Before issuing payment, request the complete 17-digit VIN of the donor vehicle. A verified donor VIN allows you to pull a vehicle history report confirming the recorded odometer mileage at the time of the collision, ensuring you are purchasing a genuinely low-mileage assembly. Furthermore, knowing the cause of vehicle salvage provides valuable mechanical context: vehicles totaled by rear-end collisions or side impacts almost always feature undamaged, perfectly running drivetrains, whereas flood-damaged salvage vehicles should be strictly avoided.
Finally, review the seller's warranty requirements carefully. High-quality recyclers offer 90-day to 6-month part warranties, but maintaining warranty validity universally requires following standard installation best practices—most notably performing a high-pressure chemical transmission cooler flush or installing a new external transmission cooler prior to startup.
- 1Ask for the donor vehicle 17-digit VIN: Verify the recorded odometer mileage, engine configuration, and maintenance history through independent title records.
- 2Inquire about the cause of salvage: Prioritize units harvested from accident-totaled vehicles with clean drivetrains; reject vehicles retired due to flood damage, saltwater submersion, or engine fires.
- 3Confirm torque converter inclusion: Ensure the sale includes the factory-matched OEM torque converter to avoid stall speed mismatches or pump engagement issues.
- 4Clarify testing and fluid condition: Ask whether the transmission was run-tested in the vehicle prior to teardown or bench-tested with a dynamic spin tester.
- 5Review written warranty and installation terms: Confirm the warranty duration, core return requirements, and mandatory pre-installation steps (such as cooler line flushing and seal replacement).
The Mandatory Transmission Cooler Flush
When an original transmission fails, destroyed clutch friction material and pulverized steel shavings are pumped directly into the radiator transmission cooler lines. If you bolt in a replacement used transmission without thoroughly flushing or replacing the vehicle transmission cooler, those trapped metal shavings will wash directly into your replacement transmission and destroy it within 100 miles.
Frequently Asked Questions
How can I tell if a used transmission is good without installing it in the vehicle?
Perform a comprehensive five-point bench evaluation: inspect the aluminum housing for cracks and damaged mounting ears; check fluid color and odor on the dipstick or drain plug for burnt clutch material; inspect torque converter hub splines and one-way stator clutch operation; match the transmission model identification tag; and verify the donor vehicle VIN and odometer mileage.
Dropping the lower oil pan to inspect the internal collection magnet for brass or silver gear flakes provides definitive physical proof of internal mechanical health.
What color should used automatic transmission fluid be?
Healthy automatic transmission fluid (ATF) should be translucent cherry red or light transparent amber. Dark brownish fluid indicates standard thermal aging. You should immediately reject any transmission with opaque black, burnt-smelling fluid or milky pink fluid, which indicates water or coolant contamination.
Should I always replace the torque converter when buying a used transmission?
Whenever possible, install the matched OEM torque converter harvested from the exact same donor vehicle. Never reuse the torque converter from your old, failed transmission, because metallic debris from the old failure remains trapped inside the converter and will circulate directly into your replacement transmission.
If the used transmission does not include a verified converter, purchase a newly remanufactured torque converter built to exact factory stall specifications.
Can I install a 2WD transmission into a 4WD vehicle or vice versa?
No. In nearly all automatic transmissions, the main output shaft differs fundamentally between 2WD and 4WD configurations. 2WD units feature a long, splined output shaft designed for a slip yoke driveshaft, whereas 4WD units feature a short stub shaft engineered to mate directly to a transfer case. Converting a 2WD transmission to 4WD requires a complete bare-case teardown.
Why is flushing the transmission cooler required before installing a replacement transmission?
When a previous transmission fails, disintegrated clutch friction material, brass particles, and steel shrapnel are pumped into the external cooler lines and radiator tank. Bolting in a replacement transmission without performing a high-pressure chemical cooler flush causes trapped debris to wash into the replacement transmission, destroying its pump and valve body.
What warranty coverage does USA Used Auto Parts provide on used transmissions?
USA Used Auto Parts backs our tested, verified used OEM transmissions with comprehensive warranty coverage (typically 6 months on qualified assemblies), guaranteeing internal mechanical integrity and exact fitment verified through donor vehicle VIN and Hollander Interchange matching.
Find a Quality-Tested Used Transmission Today
Don't gamble on untested scrap transmissions. USA Used Auto Parts provides rigorously inspected, low-mileage OEM replacement transmissions complete with torque converters and backed by warranty.
Relevant Parts Inventory
Used Transmissions Inventory
Tested OEMSearch tested, low-mileage used automatic and manual transmissions complete with matching torque converters and warranty.
Used Engines Inventory
Explore low-mileage used OEM engines, compression-tested and verified by 17-digit vehicle VIN.
Search All Recycled Parts
Browse transfer cases, driveshafts, differentials, and genuine recycled OEM parts for all makes and models.
Contact Drivetrain Specialists
Speak with our technical team to verify transmission broadcast codes, Hollander numbers, and exact vehicle fitment.